
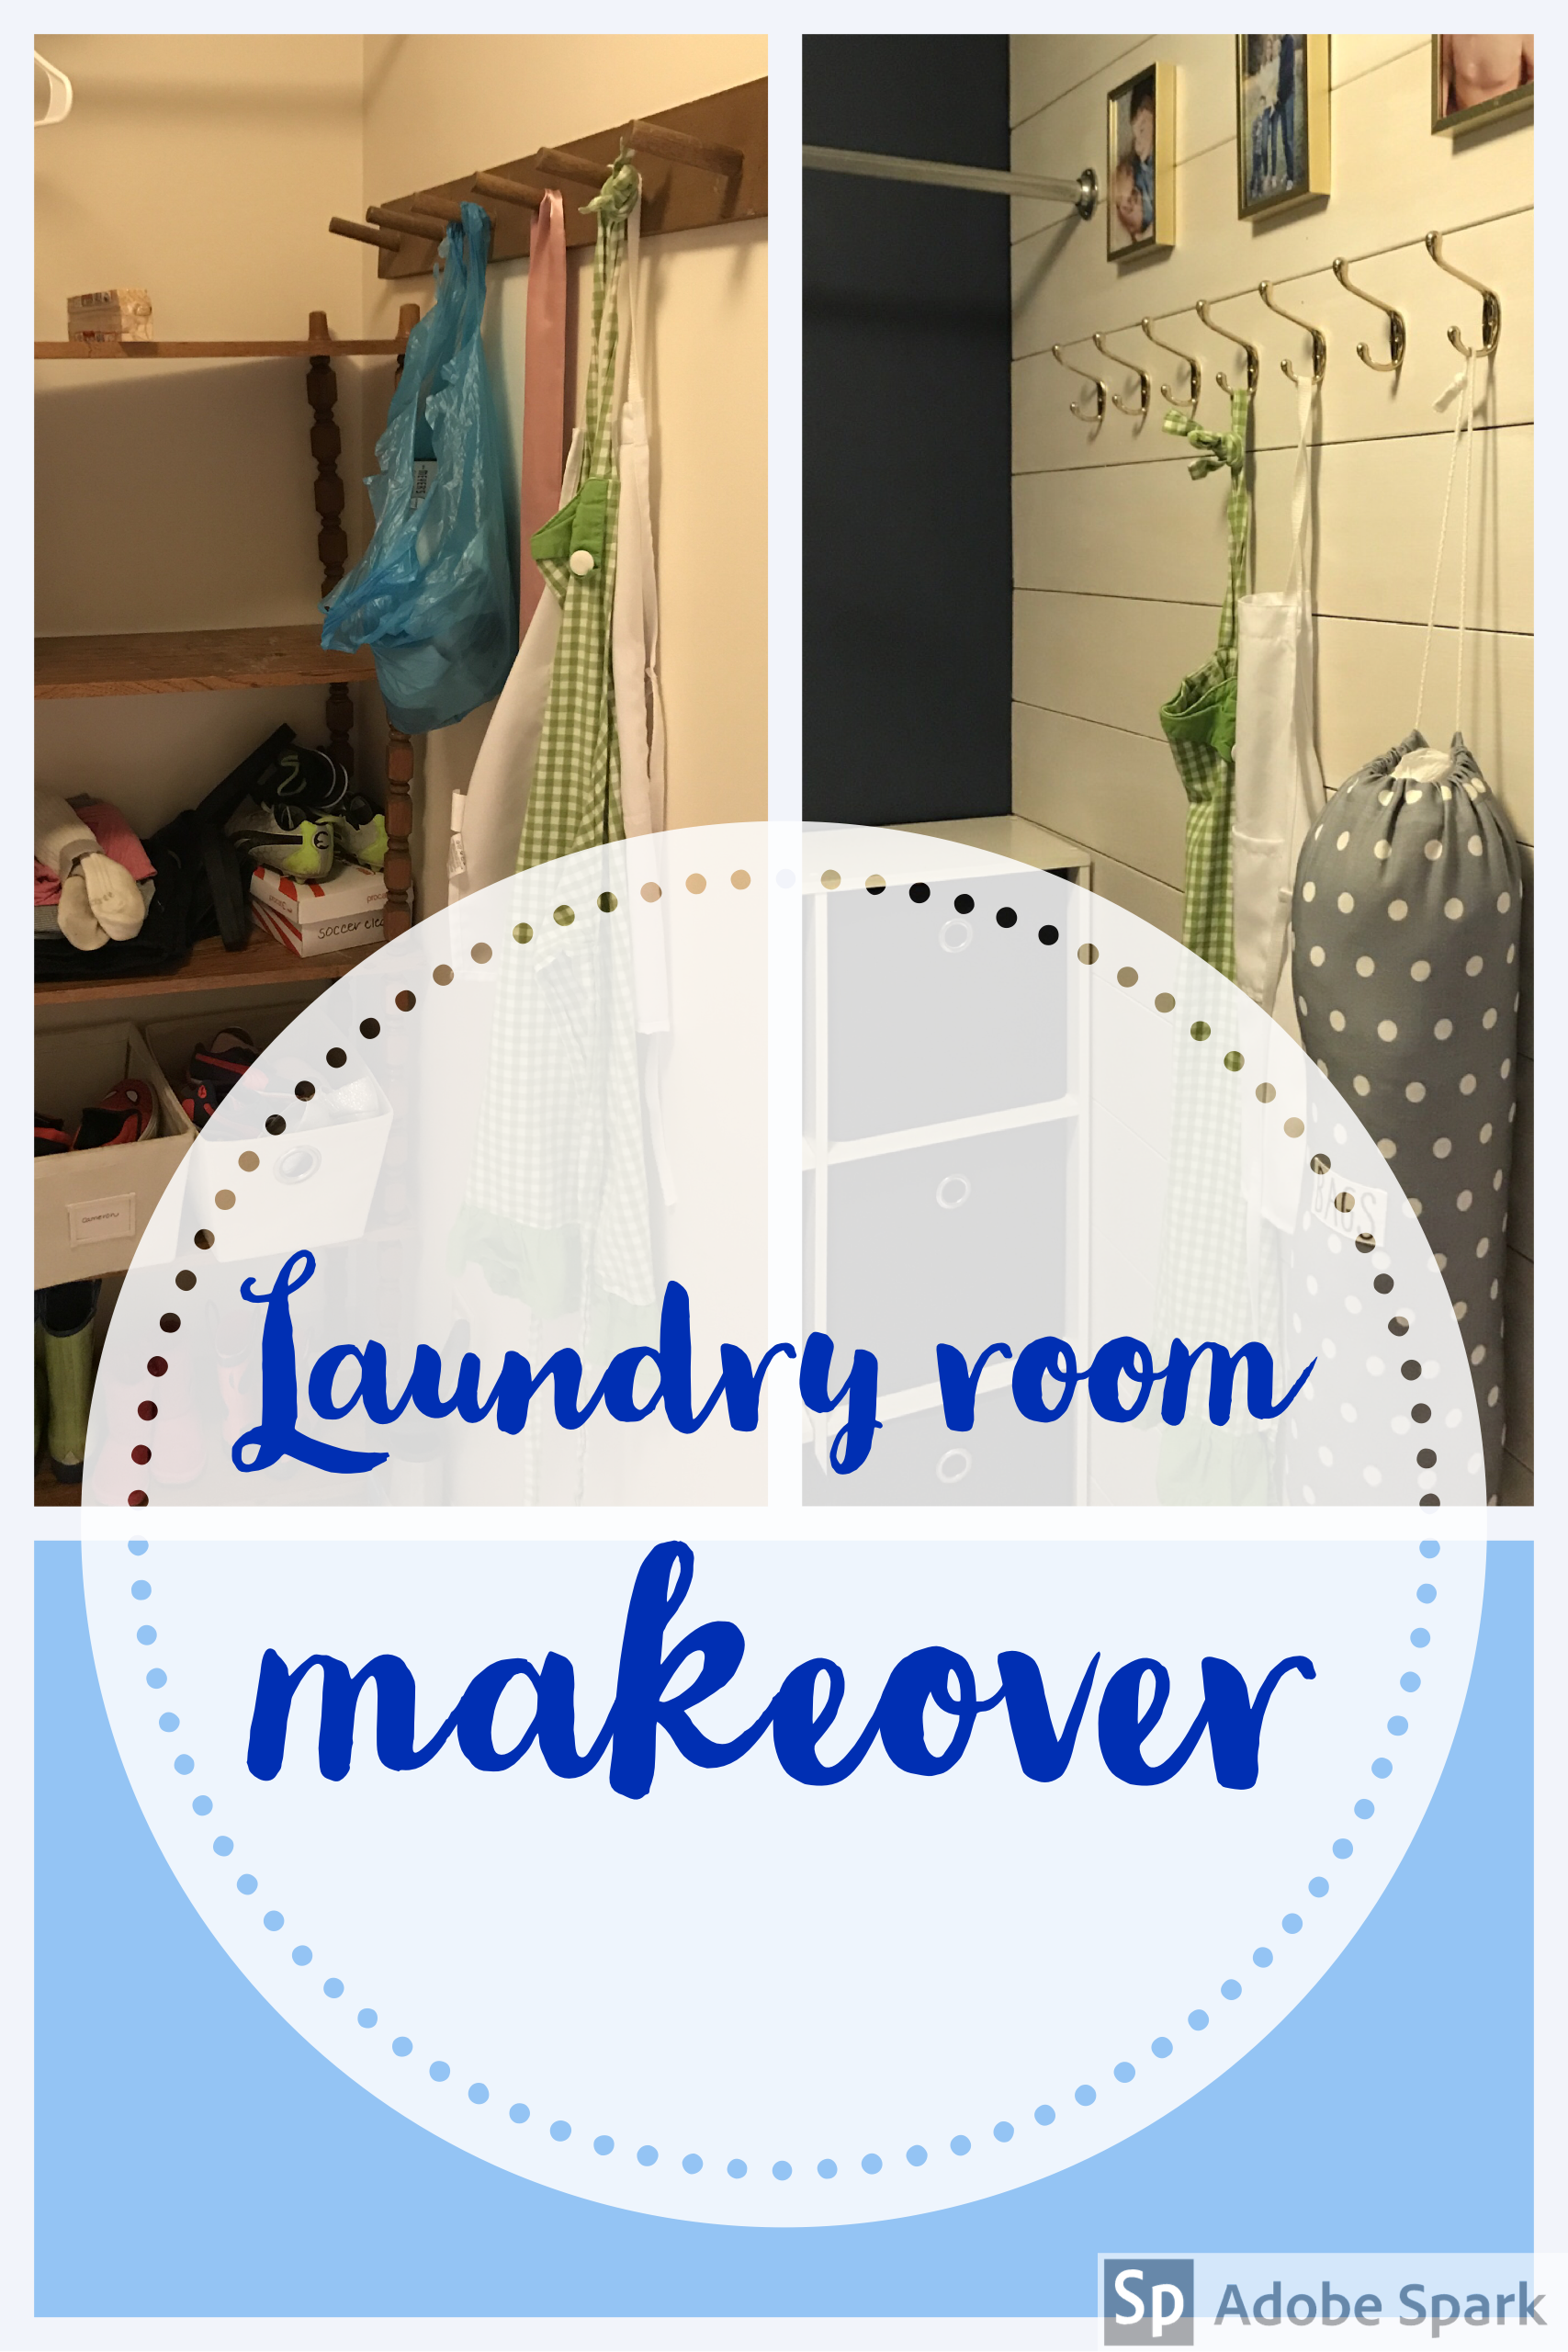
Laundry Room Makeover
I spend a lot of time here. It was time to make it a nice place to be.
Old laundry room. In need of help.
So here are a few before photos. It is really nice to have a laundry room on the first floor. The issue is that it looked so dated. I could see it from the kitchen and guests can see it (if the door is open) when they are in the kitchen or in the hallway, and it just did not match our style. This house was built in the 1980's and the style had not really been updated very much since that time. The laundry room was no exception.

Don't judge the old washer and dryer. We got them 10 years ago when we were BROKE.

These things hung above the washer and dryer. It was okay but not a good use of the little space.
We previously had cabinets hanging above the washer and dryer. They were okay but the room is small and I wanted a better use of the space. Plus I was sick of looking at this style of cabinet.


So I started by getting real with my organization. All this stuff was just floating around this room and it was a giant mess. First, I had to get the plastic bag situation under control. We had a giant plastic bag full of about 300 plastic bags. I am all about recycling those bad boys, but I was sick of looking at them. So I bought a plastic bag holder to keep control of the bag chaos.
I was starting to feel a little better about this room.

This is our bag situation - after we filled the thing in the laundry room.
Next, I asked T to find something to hang this laundry board. He used some old curtain tie backs that we bought at Target years ago.

Curtain ties holding up the ironing board
Finally, I bough this awesome holder online to hold the broom, mop, and Swiffer that were constantly falling all over me when I tried to use the washing machine. It already looks neater even without the paint and my grandiose plans. You can find it here.
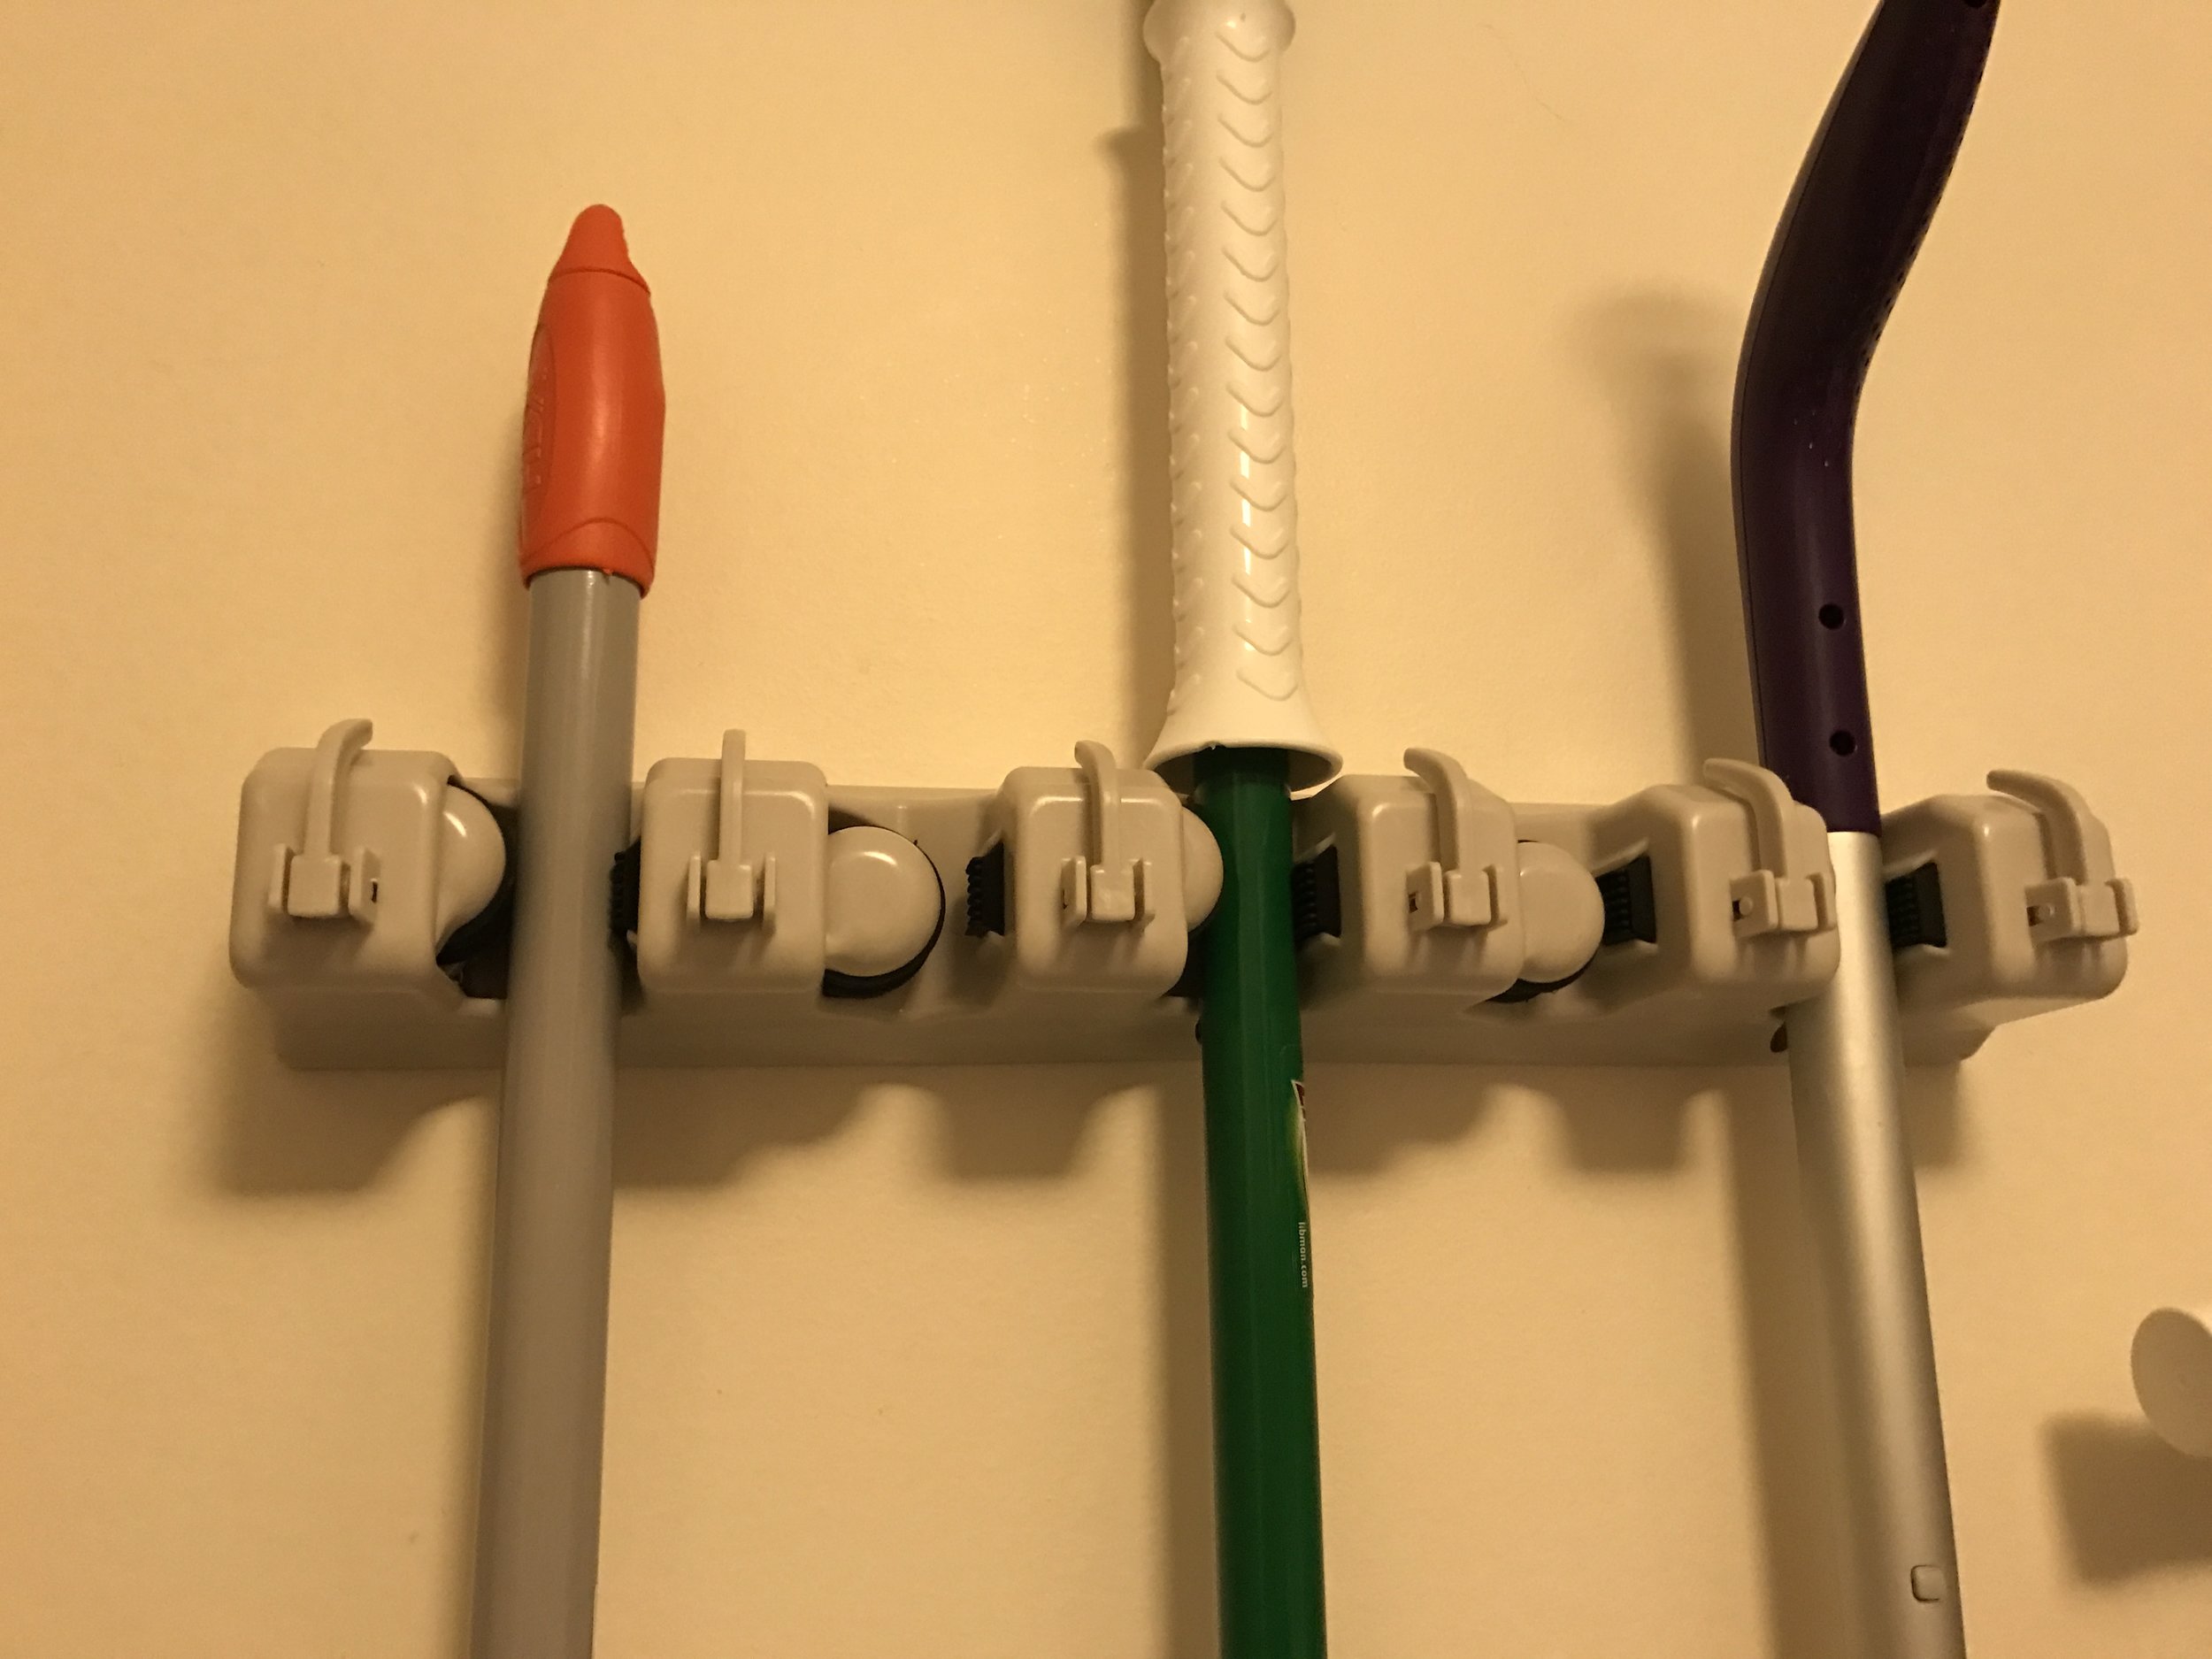
Awesome little guy holding up the tools
I really wanted to see some style when I walked by this room. I was just tired of seeing the brown cabinets with the dreary old cream colored walls. It just looked so dated and sad.
The next step was the face lift. I am always amazed at what a coat of fresh paint can do for a room. I love changing the entire look and feel of a room with a splash of color.

I picked navy blue because I thought it would provide and nice contrast to all of the white in this room. White and navy has a nice classic look. Plus I wanted to add gold details that would pop against the navy. The paint we chose is Glidden America's Cup Navy. We used the kind with primer in it since it was so dark compared to what we were painting over. It took two coats and that was it. From someone who has painted three coats multiple times, it is worth it at this point in our painting "careers" to buy nicer stuff.

Now, I realize the floor is not cute. This is something we will have to tackle on another weekend. We work Friday night to Sunday afternoon on our projects so we can't take on too much at one time. I also didn't notice this gross looking trim. That will have to come down.

DIY SHIPLAP!
I was dying to try the shiplap trend but I couldn't figure out where it might work in our house. The navy and white of the laundry room presented he perfect opportunity.
- Measure your space, figure out how many boards it will take to cover the space
- Order the plywood. For this T ordered two half inch plywood boards (the ceiling in this room is 8ft tall)
- Ask them to cut it into your desired size of boards. We chose 6 inch strips. Home Depot will cut these for you if you ask. You may have to pick it up later so make sure you budget your time. We did this on a Friday afternoon, knowing that we would install it on Saturday.
- Make sure you ask them to cut WITH the grain. We had a really bad experience when we were doing our floors. I really thought it was a given but someone cut our $350 worth of plywood against the grain and they were a train-wreck. We had to have them re-cut and we wasted three hours on this fiasco.
- Next, make sure they fit.
- Sand the boards to get them to your desired texture.
- Next we painted the edges of the shiplap. We knew that they would lay up against the freshly painted blue wall and we didn't want to get white paint all over it.
- Start at either the top or the bottom depending on which is more important to you that it look even. Ours spaced our perfectly so it wasn't an issue this time. But you may end up with a situation where you have to cut off an inch on either the top or bottom. Just think ahead.
- Space out the boards using a coin of some kind. You can see that T is using pennies in the photo below to space out the boards as he nails them to the wall.
- Nail them in! Fortunately, our awesome next door neighbor has a nail gun and lets us borrow it when we are working on a project. Great neighbors are truly priceless.
- In other projects we have repainted or stained the nail holes. Here, I like the look of the holes. I think they look rustic and authentic.
- Finally, lay on the paint. I decided to paint these white, but after they were primed I kind of like the look just the way it is. I may decide to go back and slather on some paint, but for now I like it like this,.

Jumping on the shiplap trend
After it was all done, it was my favorite time, time to decorate! I also bought a gold frame for this room which I was impatient to hang. (You can see it above.) I couldn't even wait for the shiplap to be done. I love these gold details! The photo in the picture above is an old one of M, but I didn't have any more recent 5x7 photos. Plus it is just darn cute.
Finally it has a fresh coat of paint, new shelves from Target, and brackets spray painted gold for fun. I ordered some 5x7's of family photos and bought a new shelf for the corner. I store boots down below, shoes for each kid in a separate bin, then all of the hats and gloves for the whole family in the next row. I have so much space with these bins that I was able to clean out the front closet. It's just a much better use of space.

Our finished shiplap walk with gold hooks. These boards are just primed and I like the look. I might finish painting them white or just leave them.
I really love the look of this gray plastic bag holder in this room too. Gray is my go-to neutral tone. It came in two sizes and the XL size really only fit a fraction of the bags we had. I think we probably had saved way too many bags.

Organized and looking pretty. The mop and broom holder looks even nicer with the blue background.

We spray painted these brackets gold. I love the contrast and the style it adds. I really love these gray bins. I have purchased a bunch of them for all over the house. I have them in my bathroom closet, on our bathroom shelves, in the front closet, and now in the laundry room.

We replaced the light switch and the outlets. They were all beige and looked horribly 80's. Really, replacing these all over the house changed the entire feel. It makes it feel so much newer and neater. I love how much tiny details can really make a big difference.

One last detail, a pic of T and I. Every so often we like to get some nice family pics taken. Our awesome photographer snapped this as we returned to our car. Photo credit: Jules White Photography.
